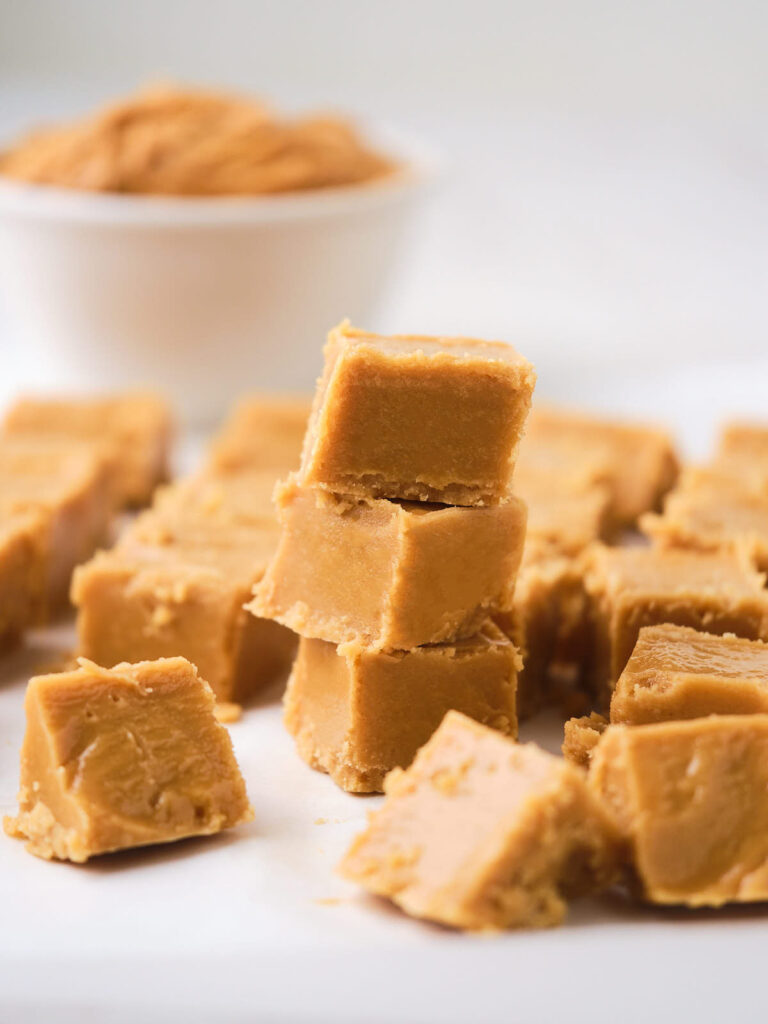
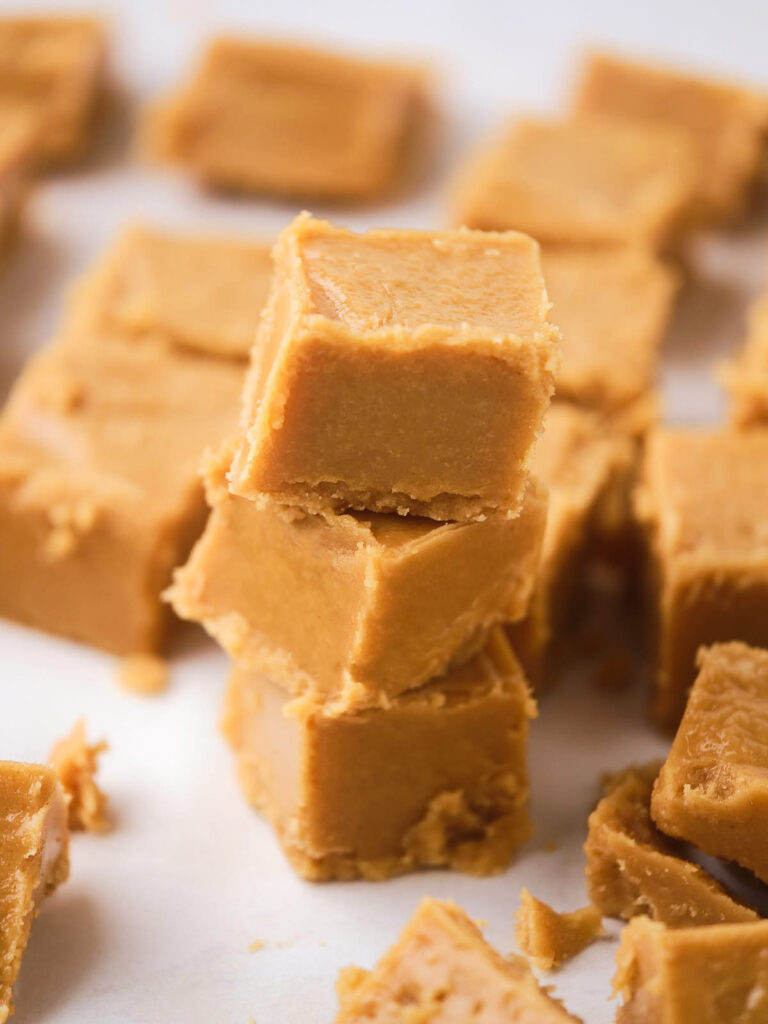
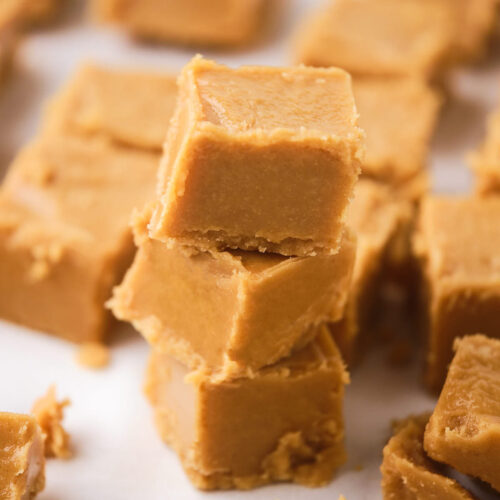
Creamy Peanut Butter Fudge
As a participant in the Amazon Services LLC Associates Program and other affiliate programs, Quick Prep Recipes may collect a share of sales or other compensation from the links on this page. This comes at no additional cost to you, and all the prices and availability are accurate at the time of publishing.

I’ve been making this creamy peanut butter fudge for years, and it is hands down one of the most requested treats in my house. My kids are obsessed with peanut butter, and I’m a huge fan of fudge, so this one was always going to be a household staple. What I love most is that five simple everyday ingredients are all it takes to get candy-shop quality results that taste like the filling of your favorite peanut butter cup.
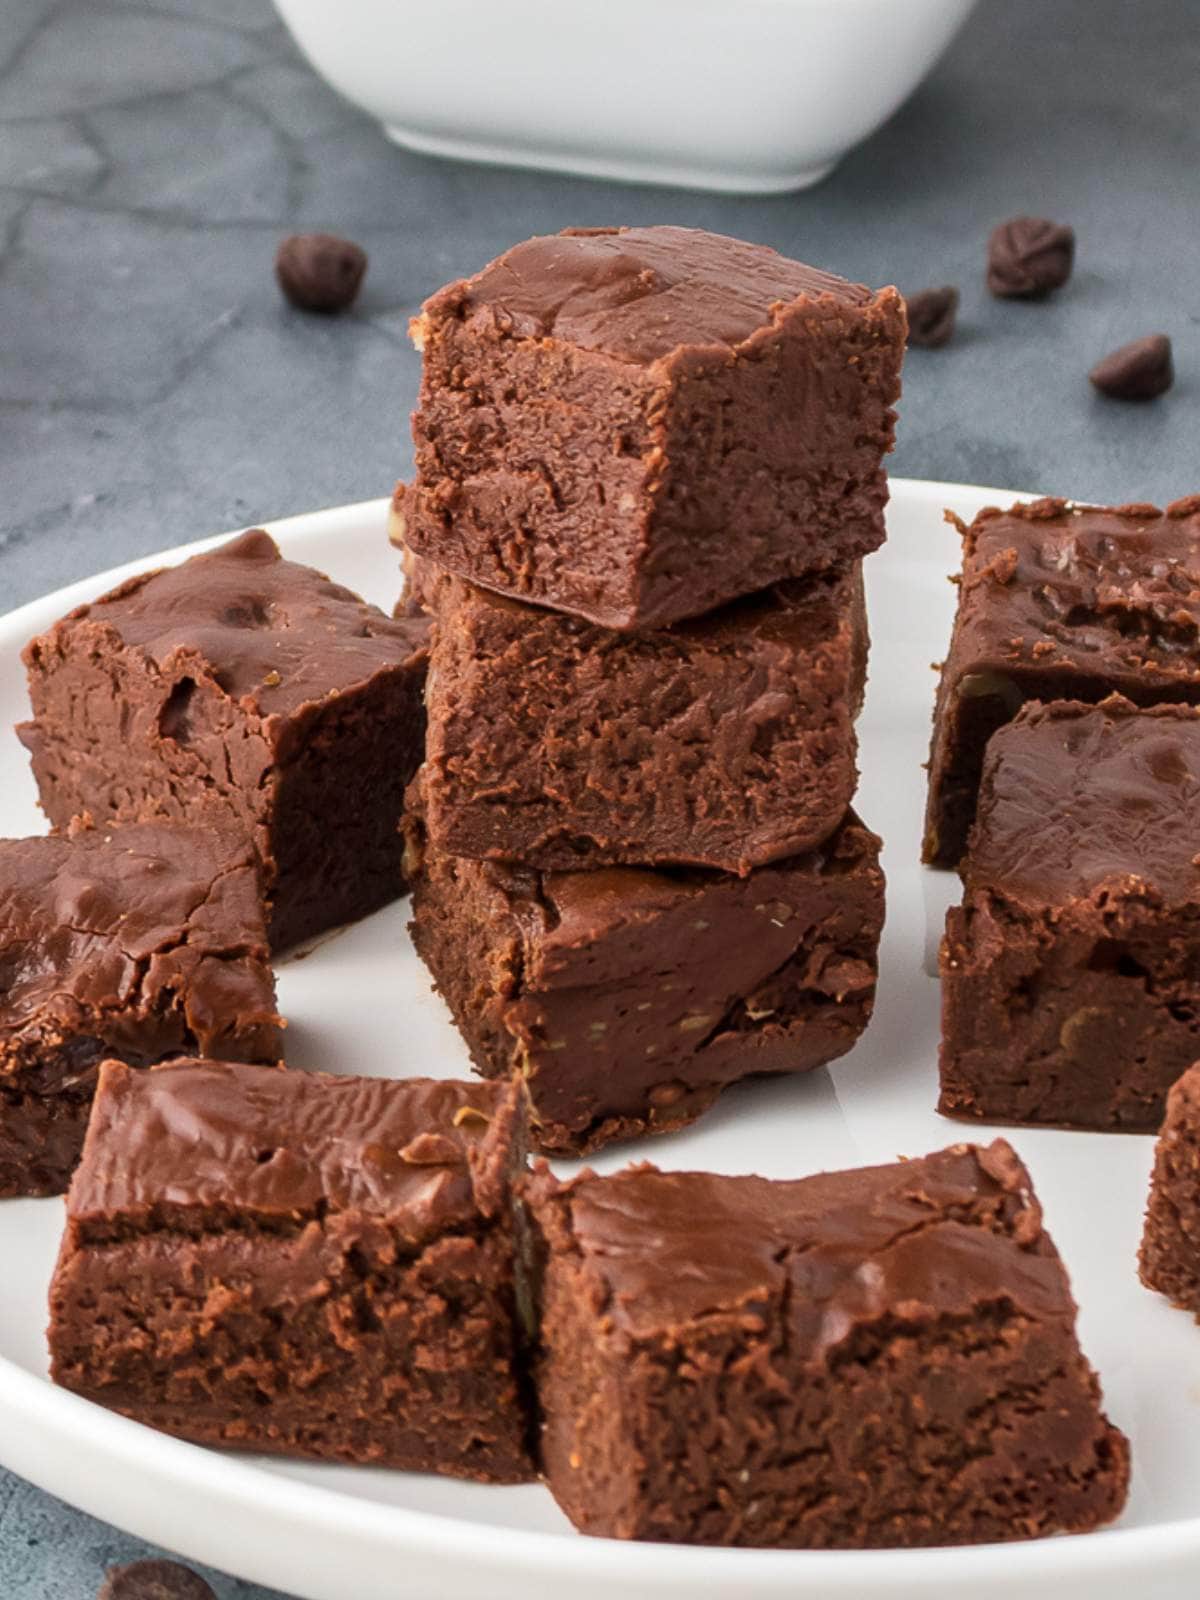
I especially love making this easy peanut butter fudge during the holidays because those golden squares look beautiful on a cookie tray alongside classics like chocolate fudge, Grandma’s fudge with nuts, or my quick 3-ingredient fudge.
Outside of the holidays, this homemade peanut butter fudge pulls its weight as an after-dinner dessert, a lunchbox treat, or a quick snack whenever that sweet tooth hits. Enjoy a square or five — no judgment here.
Why You’ll Love This Recipe
- Easy fudge recipe: Mix and chill, that’s all you have to do to make a batch of this delicious fudge. No sugar boiling or candy thermometers required!
- Basic ingredients: You only need 5 simple ingredients for this recipe, all of which you probably already have in your kitchen.
- Peanut butter goodness: Peanut butter fan? You might also like peanut butter brownies or peanut butter cup cookies!
- Holiday-worthy: An indulgent festive treat perfect for Halloween, Thanksgiving, or Christmas parties. Skip the holiday baking this year and make fudge instead.
- Adaptable: Customize your fudge the way you like it. Your favorite add-ins are welcome!
How to Make Peanut Butter Fudge
This creamy fudge is so simple to make; it takes only 10 minutes of active time to prep. There’s quite a wait to chill the fudge after that, but you’ll hardly notice after just one bite of these decadent squares!
Scroll to the bottom of this post for a printable recipe card with a full list of ingredients, measurements, and step-by-step instructions.
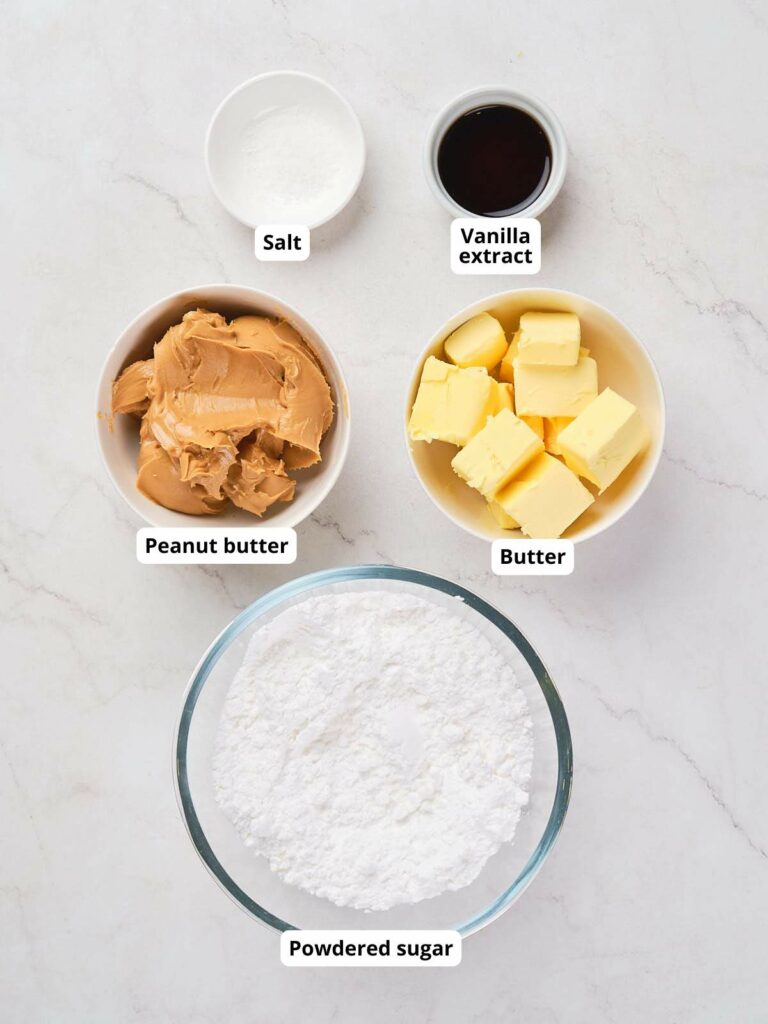
Ingredient Notes
- Butter: I use unsalted butter since we’re adding salt.
- Creamy peanut butter: The one responsible for the fudge’s flavor and smooth, melt-in-your-mouth consistency. Creamy, no-stir peanut butter like Jif or Skippy is best for this recipe. I don’t recommend using the “natural” kind that separates.
- Salt: Often overlooked, but salt is great at balancing the sweetness.
Step-By-Step Instructions
Only 2 simple steps stand between you and the best peanut butter fudge ever! Follow the instructions below to get started.
- Prep your dish with a light coat of butter or parchment paper.
- Make the batter.
- Chill
- Cut and serve.
Alternatively, you can adapt this recipe to microwave fudge. Just use a microwave-safe bowl to melt the butter and peanut butter together. Cook on high for 2 minutes, then stir well. Repeat in 60-second increments until the mixture is smooth and creamy.

Variations
There are so many fun and delicious peanut butter fudge variations to be had! Here are some of my favorites:
- If you want a little texture to your fudge, use chunky peanut butter instead of creamy. Sprinkle finely chopped peanuts on top for some extra crunch.
- Swirl melted chocolate or add a handful of white, dark, or semi-sweet chocolate chips into the mixture before it sets for the classic chocolate-peanut butter combination.
- Layer about 3/4 cup of grape, raspberry, or strawberry jam on top of the batter before it sets to make peanut butter and jelly fudge. Nostalgic!
- Dip the finished fudge squares in melted dark chocolate for an extra layer of decadence.
- Crush Oreo cookies and fold 1 cup into the fudge for a delicious peanut butter cookies-and-cream flavor.
Expert Tips
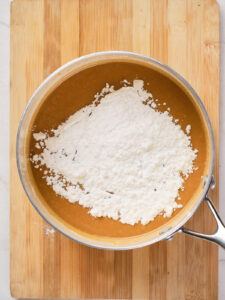
- Sift the sugar before mixing it into the base to remove clumps.
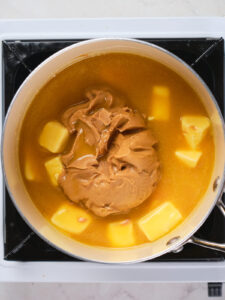
- Keep stirring, or you risk toasting or burning the peanut butter. The first time I made this, I put the peanut butter in the pot first and the butter on top and turned it on without mixing them together. The peanut butter started burning before the butter had time to melt.
- Make perfect cuts by running a knife under hot water to heat it up before using. Also, wipe it clean in between cuts. This way, you’ll get slices with clean, smooth edges.
- If the fudge is overly firm after chilling or storing overnight, leave it out on the counter to warm up for 10-15 minutes before serving.
- Fudge is one of my favorite edible gifts. Wrap a few squares in festive paper or tuck them into a small bag, and you have a stocking stuffer or gift basket addition that people genuinely get excited about.
How to Store This Recipe
The best way to keep peanut butter fudge slices is in an airtight container at room temperature, preferably away from direct sunlight. The refrigerator can dry them out, but if you’re okay with that, store the slices in an airtight container in the fridge for up to 2 weeks.
What to Serve with Peanut Butter Fudge
Peanut butter fudge is amazing as is, but can be served alongside other treats for a more varied dessert experience. Serve fudge squares with fresh fruit slices or saltine toffee and peanut butter blossoms.
When it comes to beverages, peanut butter fudge pairs well with whipped chocolate milk, hot chocolate (peppermint hot chocolate during the holidays!), strong black coffee, or black tea (like Earl Grey or English Breakfast).
More Easy Desserts To Try
- No-bake Oreo cake pops
- Magic cookies
- Chocolate popcorn
- 3-ingredient shortbread cookies
- Popcorn balls
Easy Peanut Butter Fudge Recipe
Video
Ingredients
- 1 cup butter
- 1 cup creamy peanut butter
- ½ teaspoon vanilla extract
- ¼ teaspoon salt
- 2 cups powdered sugar
Instructions
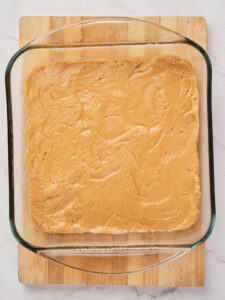
- Grease an 8×8-inch glass baking dish. Set aside.
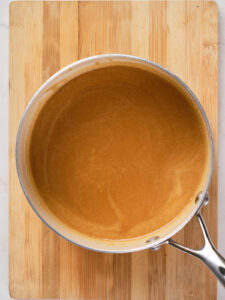
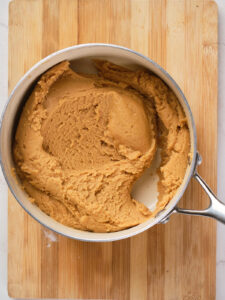
- Melt butter and peanut butter together in a small saucepan over low heat, stirring frequently until smooth.

- Remove from heat, then add the vanilla and salt.
- Slowly add the sugar one cup at a time.
- Stir well in between each addition. Make sure to remove all the lumps!
- Transfer to the prepared baking dish. Chill in the refrigerator for at least 4 hours or overnight.
- Once set, cut into a 6×6 grid to make 36 square pieces.

Notes
- My original recipe was inspired by a vintage church cookbook and used 3.5 cups of powdered sugar. I’ve since reduced it down to 2 cups.
- Leaving the fudge in the refrigerator for too long can make it dry and overly firm. If this happens, bring it out to warm up on the counter for 10 minutes before serving.
- Heat up a knife under hot water then use it to cut into the fudge to get slices with clean, smooth edges.